断断续续做过几个数据分析方面的项目,使用的是 Python 爱好者耳熟能详的 Jupyter Notebook。一开始把各种 .ipynb 文件、数据源文件都放在同一个项目目录下,看上去特别杂乱无章,整理的时候也是一团乱麻。
后来在谷歌上找到一篇介绍 Jupyter Notebook 最佳实践的文章,受益匪浅。按照书中所提的建议来组织项目,确实要清晰的多了,而且特别适合团队共同完成数据科学项目。
因此摘录其中的关键点分享出来,希望能帮助到正在学习使用 Jupyter 的朋友。
整体思路
将数据科学项目的 notebook 分为两大类:实验版和交付版,分别进行针对性的管理。
实验版 notebook
参考传统实验室中整理笔记的方法,在使用 Jupyter notebook 时,遵循以下几点:
- 每个 notebook 都要保留分析历史(和日期)记录
- 每个 notebook 仅用于开发和实验。
- 每个 notebook 只有一位作者:标注作者的首字母缩写。
- notebook 如果太长,可以进行拆分
- 如果需要,可以按主题区分 notebook。
交付版 notebook:
可交付版的 notebook 则是打磨完善的版本,并且包含有最终的分析输出。这类 notebook 需要由整个团队来进行管理,而不是交给某一个人。
版本控制
多人协作进行数据分析时,建议采用 Pull Request 的方式提交代码。通过 Git 和 Github 可以很好地实现这点。但是在查看 PR 的时候,审查人需要能给清晰地辨别出 .ipynb 文件的变动。
推荐将 .ipynb 文件转化成 .py 文件后,再进行文件差异对比,可以方便地查看代码的变化。
另外,在审查分析代码时,最好能给直接查看输出的变化。因此推荐保存一份 HTML 版的输出文件。


Post-save 钩子
可以通过 post-save 的钩子,很方便地完成上节所说的 .ipynb 文件转换成 .py 文件的工作。只需要按照如下代码所示,修改 ipython 的配置文件即可:
〜/ .ipython / profile_nbserver / ipython_notebook_config.py添加以下代码:
#如果您想自动保存笔记本的.html和.py版本:modified from:https://github.com/ipython/ipython/issues/8009import os
from subprocess import check_call
def post_save(model,os_path,contents_manager):
“””用于将笔记本转换为.py脚本的保存后挂钩”””
if model [‘type’] !=‘notebook’:
return # only do this for notebooks
d, fname = os.path.split(os_path)
check_call([‘ipython’,‘nbconvert’,‘ – to’,‘script’,fname],cwd = d)
check_call([‘ipython’,‘nbconvert’,‘ – to’,‘html’,fname],cwd = d)
c.FileContentsManager.post_save_hook = post_save
现在,每次保存到笔记本都会更新名称相同的.py和.html文件。在提交和拉取请求中添加这些,您将从这些文件格式中获益。
完整示例
这是正在进行的项目的目录结构,有一些关于命名文件的明确规则。
示例目录结构:
 - develop#(实验版 notebook)
  + [ISO 8601日期]  -  [DS-作者首字母简称]  -  [2-4字描述] .ipynb
  + 2015-06-28 -jw-initial-data-clean.html
  + 2015-06-28-jw-initial-data-clean.ipynb
  + 2015-06-28-jw-initial-data-clean.py
  + 2015-07-02-jw-coal-productivity-factors.html
  + 2015-07-02-jw-coal-productivity-factors.ipynb
  + 2015-07-02-jw-coal-productivity-factors.py
 - deliver#(最终分析,代码,演示文稿等)
  +Coal-mine-productivity.ipynb
  +Coal-mine-productivity.html
  + Coal-mine-productivity.py
- figures
  + 2015-07-16-jw-production-vs-hours -working.png
 -  src#(模块和脚本)
  + init.py
  + load_coal_data.py
  + figures#(数字和图表)
  + production-vs-number-employees.png
  + production-vs-hours-working.png
 - data(备份 - 与版本控制分开)
  + coal_prod_cleaned.csv
优点总结
本文分享的这种工作流程和目录结构,主要由两大明显的优点
首先,我们可以看到数据分析的执行过程,通过日期、作者、主题就可以进行检索
- 按日期(ls 2015-06 * .ipynb)
- 作者(ls 2015 * -jw – * .ipynb)
- 按主题(ls * -coal – * .ipynb)
其次,在审查 PR 时,保存 .py 和 .html 文件可以快速定位变动,以及直观确认输出的变化。而且采用 post-save 的钩子也是一劳永逸。
大家可以结合自己团队的情况,有选择地采纳上述建议。如果有更合理的解决方案,也欢迎大家反馈。
—
原文链接:https://www.svds.com/jupyter-notebook-best-practices-for-data-science/
Jupyter Notebook Best Practices for Data Science
The Jupyter Notebook is a fantastic tool that can be used in many different ways. Because of its flexibility, working with the Notebook on data science problems in a team setting can be challenging. We present here some best-practices that SVDS has implemented after working with the Notebook in teams and with our clients.
The need to keep work under version control, and to maintain shared space without getting in each other’s way, has been a tricky one to meet. We present here our current view into a system that works for us—and that might help your data science teams as well.
Overall thought process
There are two kinds of notebooks to store in a data science project: the lab notebook and the deliverable notebook. First, there is the organizational approach to each notebook.
Lab Notebooks:
Let a traditional paper lab notebook be your guide here:
- Each notebook keeps a historical (and dated) record of the analysis as it’s being explored.
- The notebook is not meant to be anything other than a place for experimentation and development.
- Each notebook is controlled by a single author: a data scientist on the team (marked with initials).
- Notebooks can be split when they get too long.
- Notebooks can be split by topic, if it makes sense.
Deliverable Notebooks:
Deliverable notebooks are the fully polished version of the lab notebooks, and store the final outputs of analysis. These notebooks are controlled by the whole data science team, rather than by any one individual.
Version Control
Here’s an example of how we use git and GitHub. One beautiful new feature of Github is that they now render Jupyter Notebooks automatically in repositories.
When we do our analysis, we do internal reviews of our code and our data science output. We do this with a traditional pull-request approach. When issuing pull-requests, however, looking at the differences between updated .ipynb files, the updates are not rendered in a helpful way. One solution people tend to use is to commit the conversion to .py instead. This is great for seeing the differences in the input code (while jettisoning the output), and is useful for seeing the changes. However, when reviewing data science work, it is also incredibly important to see the output itself.
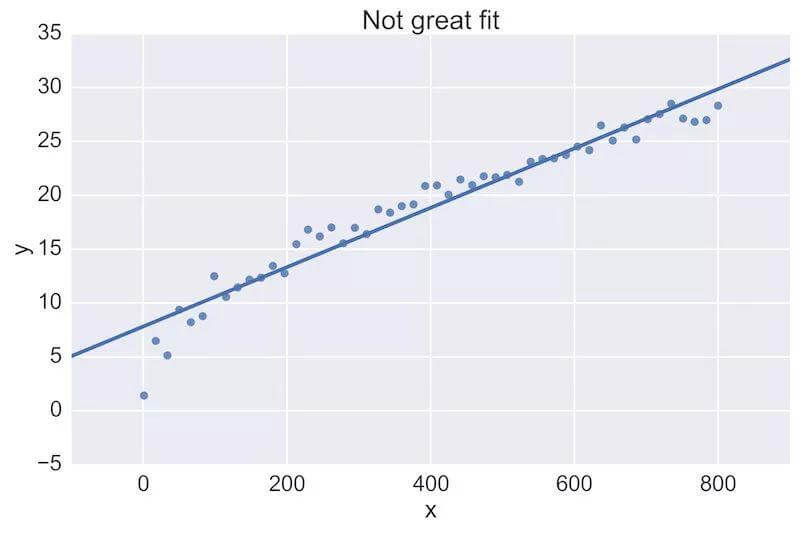
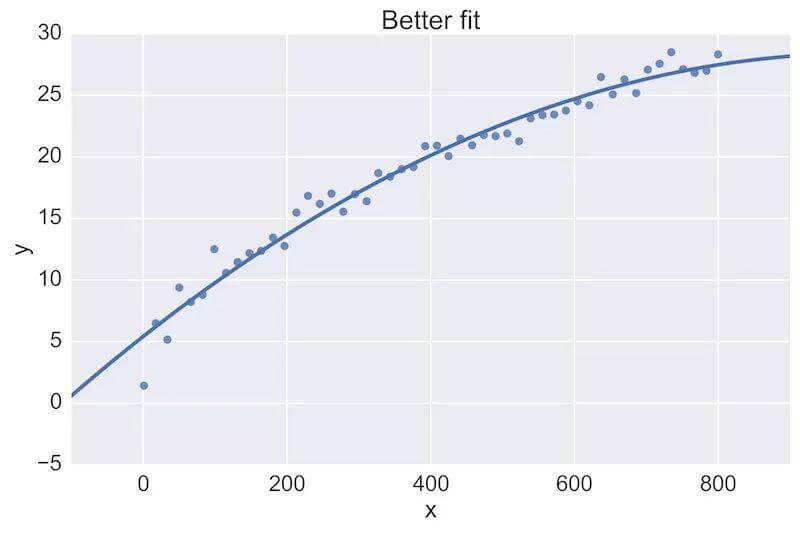
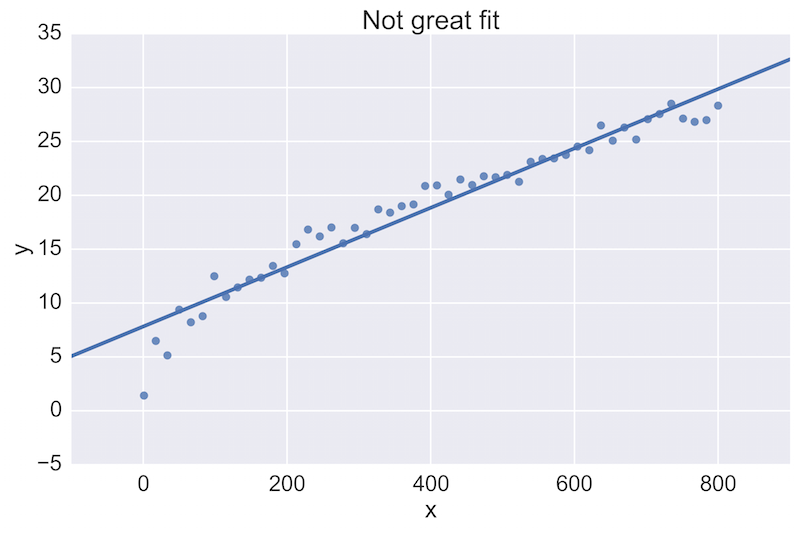
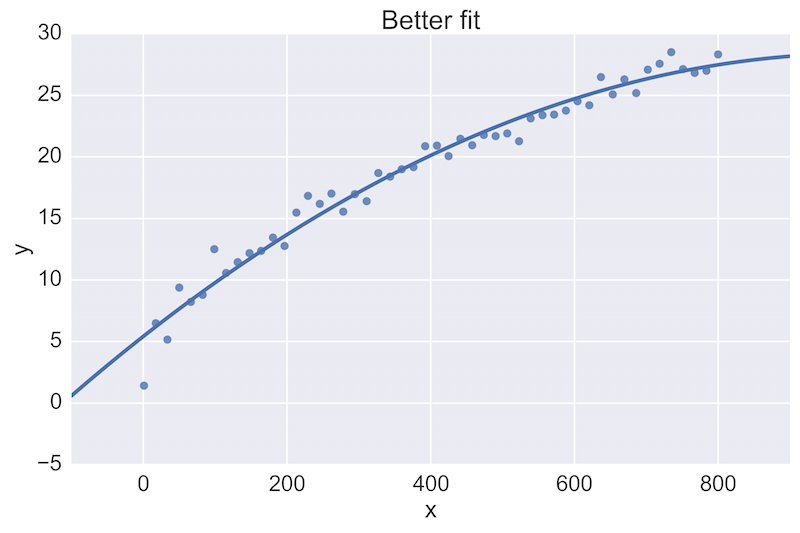
For example, a fellow data scientist might provide feedback on the following initial plot, and hope to see an improvement:
The plot on the top is a rather poor fit to the data, while the plot on the bottom is better. Being able to see these plots directly in a pull-request review of a team-member’s work is vital.
See the Github commit example here.
Take the time to notice that there are three ways to see the updated figure.
Post-Save Hooks:
We get around these difficulties by committing the .ipynb, .py, and .html of every notebook. Creating the .py and .html files can be done simply and painlessly by editing the config file:
~/.ipython/profile_nbserver/ipython_notebook_config.py
and adding the following code:
### If you want to auto-save .html and .py versions of your notebook:
# modified from: https://github.com/ipython/ipython/issues/8009
import os
from subprocess import check_call
def post_save(model, os_path, contents_manager):
    """post-save hook for converting notebooks to .py scripts"""
    if model['type'] != 'notebook':
        return # only do this for notebooks
    d, fname = os.path.split(os_path)
    check_call(['ipython', 'nbconvert', '--to', 'script', fname], cwd=d)
    check_call(['ipython', 'nbconvert', '--to', 'html', fname], cwd=d)
c.FileContentsManager.post_save_hook = post_save
Now every save to a notebook updates identically-named .py and .html files. Add these in your commits and pull-requests, and you will gain the benefits from each of these file formats.
Putting it all together
Here’s the directory structure of a project in progress, with some explicit rules about naming the files.
Example Directory structure:
- develop # (Lab-notebook style)
  + [ISO 8601 date]-[DS-initials]-[2-4 word description].ipynb
  + 2015-06-28-jw-initial-data-clean.html
  + 2015-06-28-jw-initial-data-clean.ipynb
  + 2015-06-28-jw-initial-data-clean.py
  + 2015-07-02-jw-coal-productivity-factors.html
  + 2015-07-02-jw-coal-productivity-factors.ipynb
  + 2015-07-02-jw-coal-productivity-factors.py
- deliver # (final analysis, code, presentations, etc)
  + Coal-mine-productivity.ipynb
  + Coal-mine-productivity.html
  + Coal-mine-productivity.py
- figures
  + 2015-07-16-jw-production-vs-hours-worked.png
- src # (modules and scripts)
  + init.py
  + load_coal_data.py
  + figures # (figures and plots)
  + production-vs-number-employees.png
  + production-vs-hours-worked.png
- data (backup-separate from version control)
  + coal_prod_cleaned.csv
Benefits
There are many benefits to this workflow and structure. The first and primary one is that they create a historical record of how the analysis progressed. It’s also easily searchable:
- by date (
ls 2015-06*.ipynb) - by author (
ls 2015*-jw-*.ipynb) - by topic (
ls *-coal-*.ipynb)
Second, during pull-requests, having the .py files lets a person quickly see which input text has changed, while having the .html files lets a person quickly see which outputs have changed. Having this be a painless post-save-hook makes this workflow effortless.
Finally, there are many smaller advantages of this approach that are too numerous to list here—please get in touch if you have questions, or suggestions for further improvements on the model!
Addendum
Jupyter 4.x is now out! If you use the incredibly useful Anaconda distribution, you can upgrade with conda update jupyter. More options covered here.
Further, config files are stored in ~/.jupyter by default. This directory is the JUPYTER_CONFIG_DIR environment variable. I’m going to first describe the above with the default config, and go into the complicated way of doing with Jupyter’s version of profiles.
The default config file is found at: ~/.jupyter/jupyter_notebook_config.py
If you don’t have this file, run: jupyter notebook --generate-config to create this file.
Add the following text to the top of the file:
c = get_config()
### If you want to auto-save .html and .py versions of your notebook:
# modified from: https://github.com/ipython/ipython/issues/8009
import os
from subprocess import check_call
def post_save(model, os_path, contents_manager):
    """post-save hook for converting notebooks to .py scripts"""
    if model['type'] != 'notebook':
        return # only do this for notebooks
    d, fname = os.path.split(os_path)
    check_call(['jupyter', 'nbconvert', '--to', 'script', fname], cwd=d)
    check_call(['jupyter', 'nbconvert', '--to', 'html', fname], cwd=d)
c.FileContentsManager.post_save_hook = post_save
And you will have the same functionality above. Run jupyter notebook and you’re ready to go!
If you want to have this saving .html and .py files only when using a particular “profile,” it’s a bit trickier as Jupyter doesn’t use the notion of profiles anymore (as far as I can tell).
First create a new profile name via a bash command line:
export JUPYTER_CONFIG_DIR=~/.jupyter_profile2
jupyter notebook --generate-config
This will create a new directory and file at ~/.jupyter_profile2/jupyter_notebook_config.py. Then run jupyter notebook and work as usual. To switch back to your default profile you will have to set (either by hand, shell function, or your .bashrc) back to: export JUPYTER_CONFIG_DIR=~/.jupyter
Happy Data Sciencing!


